This article explains how to set up two-factor authentication for your cPanel account.
If enabled on your server, you have the ability to add an additional layer of protection to your cPanel account. Normally, your cPanel account is protected by a username and a password, but it is possible to enable another layer of authentication on top of that. This is known as two-factor authentication as there are two different types of authentication required in order to access your account.
This additional protection will require you to enter a constantly changing 6-digit security code in addition to your username and password.
Two-Factor Authentication (2FA) is an improved security measure that requires two forms of identification: your password and a generated security code. With 2FA enabled, an application on your smartphone will provide you with a code that you must enter with your password to log in. Without your smartphone, you cannot log in.
Table of Contents
Enabling Two-Factor Authentication in the cPanel Google Authenticator
The Two-Factor Authentication menu can be found in the cPanel >> Security >> Two-Factor Authentication:

Go to the Two-Factor Authentication menu and click on the Set Up Two-Factor Authentication button:

To configure 2FA, you should link your cPanel account and Google Authenticator app
There are 2 ways to connect the app:

If you proceed with the Google Authenticator App, you will see the following start page. Choose Begin to further set up the app:

In case you already have a key added, you will need to press on the “+” button to add a new key:

You can add an account by Scanning a barcode or Entering a provided key:

In case the Scan a barcode option is chosen, the camera app will open and you will need to place the QR code from the cPanel within the red lines displayed.
It is also possible to use the Enter a provided key option. You will be prompted to the next page where you will need to enter the following details previously specified in the cPanel:
- Account name
- Your key
The key can be either time-based or counter-based. With the time-based option, the 2FA app generates a new six-digit security code for your cPanel account every 30 seconds. With the counter-based key, you tap a button, which then asks for the next number.

After the key is added to the Google Authenticator app, you may proceed with further configurations.
Logging into the cPanel
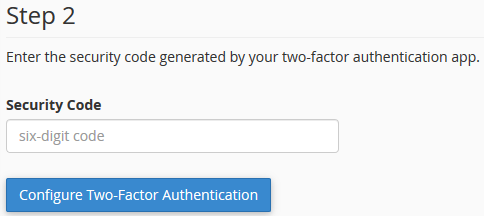
After the app is installed and connected to the cPanel, continue by entering the six-digit security code into the cPanel >> Security >> Two-Factor Authentication >> Step 2 >> Security code:

You should receive the following success message:

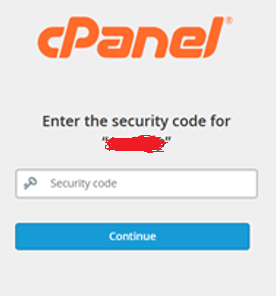
During the next cPanel login, after you enter your username and password, you will be redirected to the next page to enter the security code:

Disabling Two-Factor Authentication in cPanel
If you have two-factor authentication enabled and you have a working authenticator, you can turn off this feature when logged into cPanel.
Step 1: Log into cPanel provided by hosting provider. Typically, you can do this via a URL like: https://DOMAIN.COM/cpanel (Replace DOMAIN.COM with your cPanel main domain name.)

Step 2: In cPanel’s search box, type “factor” or “two” and select Two-Factor Authentication.

Step 3: Click Remove Two-Factor Authentication to disable it.
Once the feature is disabled, remove the entry from any of your authentication applications, as those login tokens will no longer be good.

Remove 2F Aauthentication (2FA) via command line
1. Run the below command as root user to disable 2FA via terminal: whmapi1 twofactorauth_disable_policy .
If it helps, access the server remotely as root user and follow the below steps:
cd /var/cpanel/authn/twofactor_auth
and rename the .json files to something else or simply run the below command :
mv -v /var/cpanel/authn/twofactor_auth/tfa_userdata.json{,.bak}; echo ‘{}’ >> /var/cpanel/authn/twofactor_auth/tfa_userdata.jso


