Introduction
Install Webmin – Webmin is an open-source server management control panel that lets you perform system administration tasks using a web-based graphical user interface (GUI) on Linux systems. It offers a modular design with a core set of functionalities with the ability to install additional modules and manage various system aspects such as user accounts, disk quotas, networking, and applications.
This article explains how to install Webmin on Ubuntu 24.04 server to manage and monitor system functionalities using the web-based control panel.
Table of Contents
Install Webmin
Step 1: Updating the Package Cache
Comment:
apt update

apt upgrade
Output:


Step 2: Install the required packages.
Comment:
apt install software-properties-common apt-transport-https wgetOutput:

Step 3: Import and Add Webmin Repository Key.
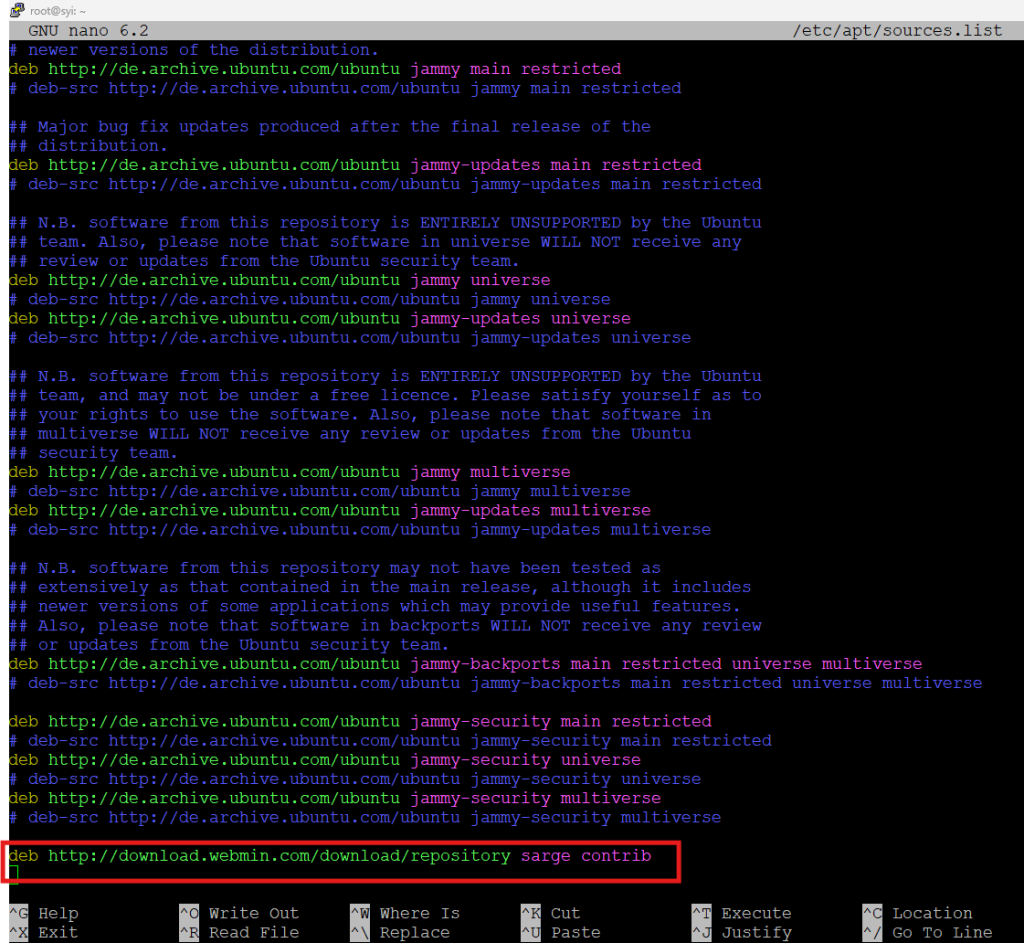
By default, Webmin is not available in the default repository of Ubuntu. Therefore, you need to add the repository. You can add the repository by editing the /etc/apt/sources.list file:
sudo nano /etc/apt/sources.list
Add the following lines:
deb http://download.webmin.com/download/repository sarge contribOutput:

Save the file and exit the editor. If you had used nano to edit, you can exit by pressing CTRL+X, Y, then ENTER.
Step 4: Install webmin
Next, update the list of packages again in order to include the now-trusted Webmin repository:
apt updateThen install Webmin:
apt install webminOnce the installation finishes, you’ll be presented with the following output:
Output. . .
Webmin install complete. You can now login to
https://your_server:10000 as root with your
root password, or as any user who can use sudo.
Step 5: Access webmin
Enter the below url on browser => Advanced => Proceed with unsafe
https://your_ip_address_or_domain:10000Once you proceed, you’ll receive a login page similar to the following:

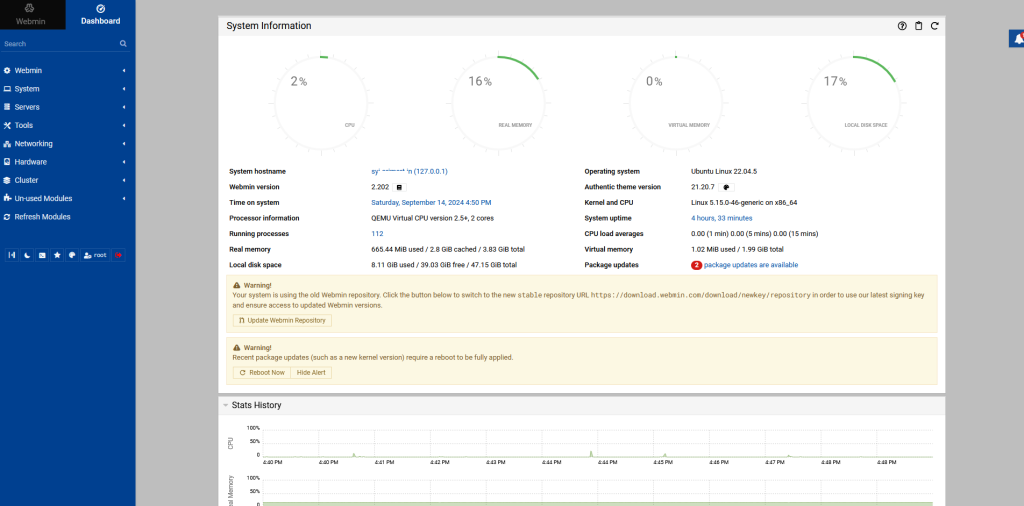
Login using the Unix username and password you’ve set up on the server. Or you can use your server’s root account. You’ll be taken to the Webmin dashboard, which looks like so:


