Introduction
Install LiteSpeed on Webuzo – LiteSpeed is a high-performance web server known for its speed, scalability, and resource efficiency. It’s an excellent choice for hosting dynamic websites, especially WordPress and e-commerce platforms. Combining LiteSpeed with Webuzo, a popular server management panel, can make hosting and managing websites simpler and more efficient. In this post, we’ll walk you through the process of installing LiteSpeed on a Webuzo-powered server.
Table of Contents
Prerequisites
Before you begin, ensure you have the following:
- A server with Webuzo installed.
- Root access to the server.
- A valid LiteSpeed license (if using LiteSpeed Enterprise).
How to Install LiteSpeed on Webuzo: A Step-by-Step Guide
Below steps will guide you to install LiteSpeed webserver as on Webuzo server.
Step 1: Log in to Your Webuzo Panel
- Open your Webuzo control panel by visiting
http://your-server-ip:2087(admin panel) which is shared by Hosting Server Provider - Enter your admin username and password to log in.

Step 2: Update Webuzo
It’s essential to have the latest version of Webuzo installed to ensure compatibility with LiteSpeed.
- Navigate to Server Settings > Update System Apps.
- Click Update to ensure Webuzo and all related packages are up to date.
Step 3: Install LiteSpeed Web Server
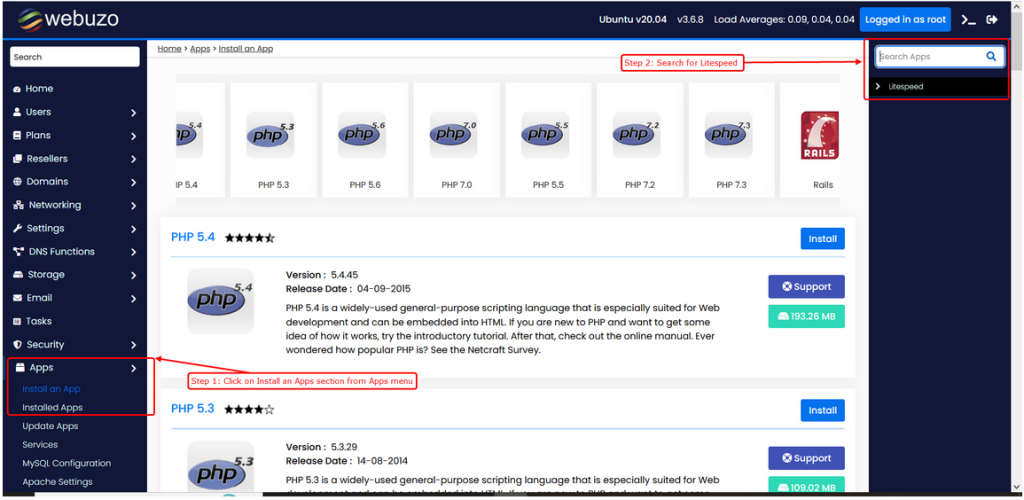
- In the Webuzo admin panel, navigate to the Apps section and click on Install An App menu.
- Then search for the Litespeed app and then click on it.

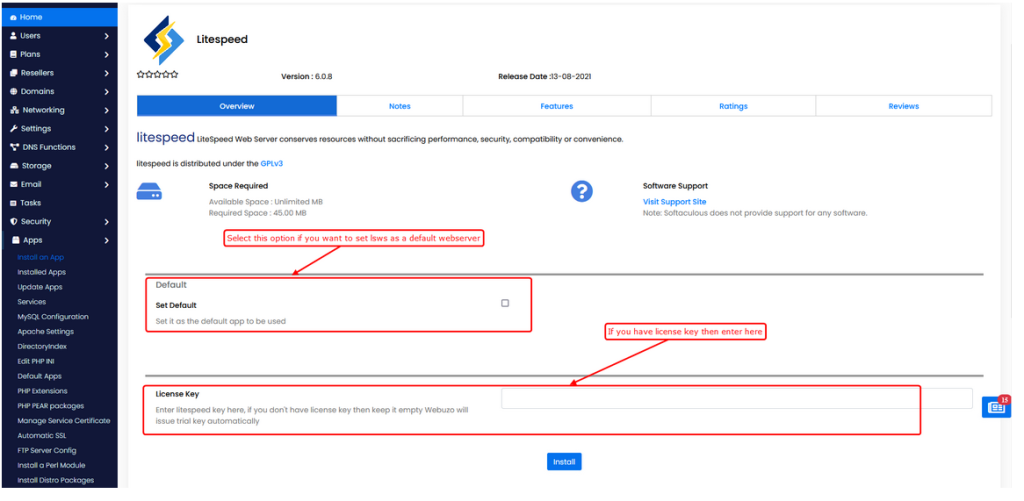
- Now you will have the LiteSpeed page to install it on the Webuzo server.
- You will be having an option to set LiteSpeed as a default webserver. If checked/selected Webuzo will set litespeed as a default webserver once successfully installed.
- There is textbox provided to enter the License key of Litespeed.

Note: If you’re installing LiteSpeed Enterprise, ensure you have your LiteSpeed license key handy. Webuzo will prompt you to enter the license key during the installation process.
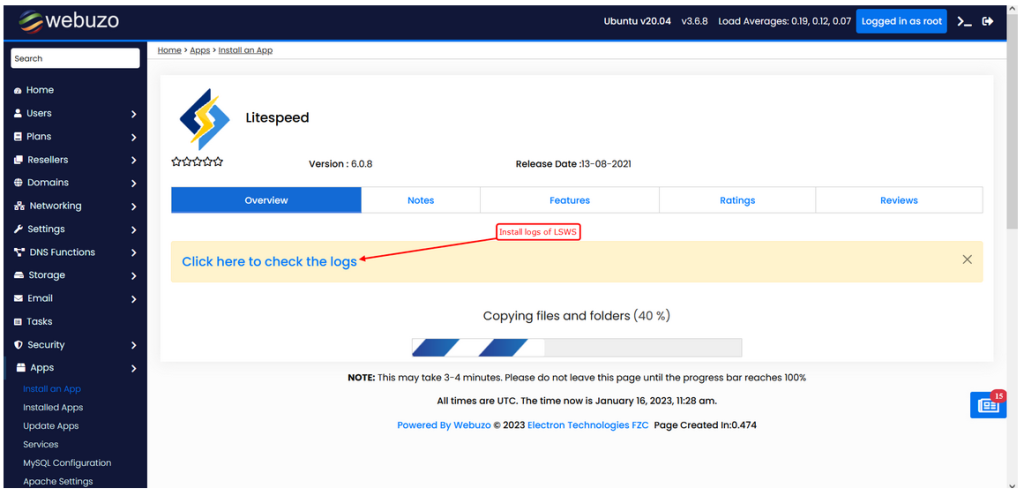
Click on Install button to start the installation process.
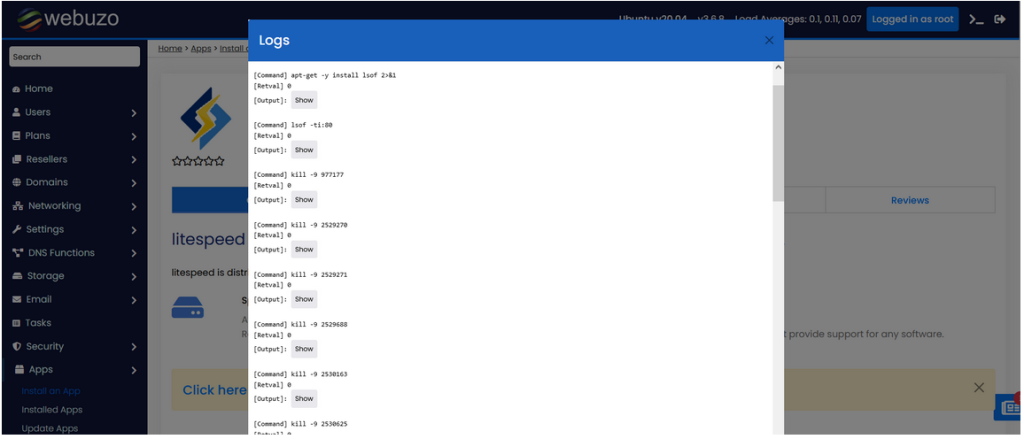
You can then check the logs of installation process.


Step 4: Configure LiteSpeed as the Default Web Server
- Once LiteSpeed is installed, go to Web Server Settings again.
- Under the Active Web Server section, select LiteSpeed as the default web server.
- Click Apply Changes to save and activate LiteSpeed.
Step 5: Verify LiteSpeed Installation
To confirm that LiteSpeed is running:
- SSH into your server or use the Webuzo Terminal feature.
- Run the following command to check the status of LiteSpeed:
sudo /usr/local/lsws/bin/lswsctrl status
3. You should see a message indicating that LiteSpeed is running.
Alternatively, you can visit your website and inspect the server headers using browser developer tools or online tools like Check Headers. You should see LiteSpeed listed as the server.
Step 6: Optimize LiteSpeed Configuration
- Enable LiteSpeed Cache:
- If hosting WordPress websites, install the LiteSpeed Cache Plugin for optimized performance.
- In Webuzo, navigate to Web Server Settings > LiteSpeed Configuration to enable caching.
- Set Up Virtual Hosts:
- Use Webuzo to create virtual hosts for your domains and point them to the correct document root.
- Navigate to Domain Settings > Manage Domains to add or configure domains.
- Adjust PHP Configuration:
- If you’re hosting PHP applications, ensure LiteSpeed is configured to use the correct PHP version.
- Navigate to PHP Settings in Webuzo to manage PHP versions and settings.
Step 7: Secure Your LiteSpeed Server
- Enable HTTPS:
- Navigate to SSL Settings in Webuzo to generate or upload SSL certificates for your domains.
- Configure LiteSpeed to use these certificates for secure connections.
2. Firewall Configuration:
- Use Webuzo’s security tools to configure a firewall and protect your server from unauthorized access.
3. Regular Updates:
- Ensure LiteSpeed and other server components are kept up to date for security and performance.
Step 8: Test Your Server Performance
After installing LiteSpeed, test your server’s performance using tools like:
- GTmetrix: For page speed analysis.
- Pingdom: For uptime and response time monitoring.
- ApacheBench (ab) or Siege: To benchmark server performance under load.
Conclusion
Installing LiteSpeed on Webuzo combines the power of a high-performance web server with an intuitive server management panel. Whether you’re hosting a single website or multiple domains, this setup ensures fast, secure, and scalable hosting.
By following the steps outlined above, you can quickly set up LiteSpeed on your Webuzo-powered server and enjoy improved website performance and management flexibility.


