Change server hostname – A hostname is a Fully Qualified Domain Name (FQDN), used to identify your server. By default, your VPS/Dedicated server has a generic hostname assigned to it. For example, vps####.vpswebhostingindia or ded###.vpswebhostingindia. However, you can customize your hostname to improve your ability to send email from your domain/server. In this guide, you can learn how to change the server hostname, using the Web Host Manager (WHM).
Table of Contents
Changing the server hostname may temporarily interrupt services. Always schedule such changes during periods of lower activity to minimize potential disruptions.
Updating the server hostname via WHM is a straightforward process that ensures accurate identification and enhances the server’s professional appearance online.
Following these steps will help you change the hostname while minimizing service interruptions.
How to change server hostname in WHM
- Log in to the WHM control panel using your WHM URL and credentials. If you need help accessing your WHM, please contact our support team.

2. Enter “Network” in the search bar to locate the Networking Setup options.
3. Click Change Hostname.

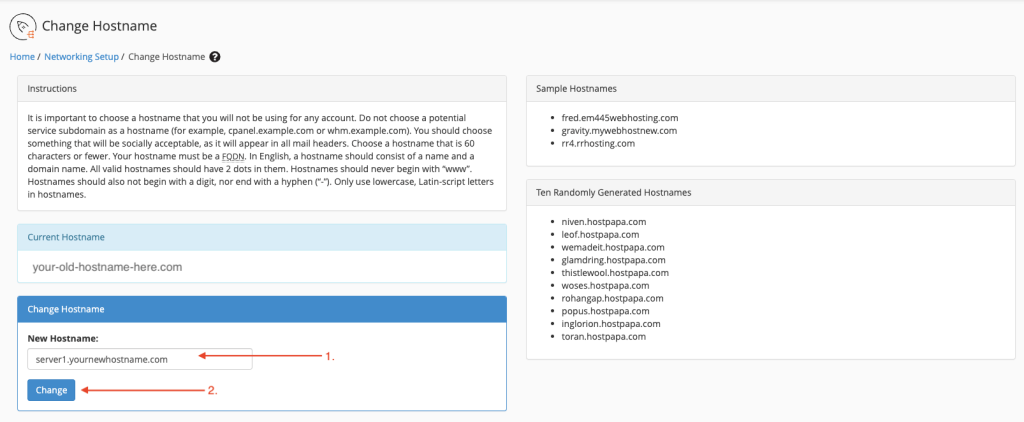
- Scroll down to the Change Hostname section. Enter the new hostname that you want to use for your server and click Change.

- A popup window will appear confirming the hostname change is in progress.
IMPORTANT: You must use a fully-qualified domain name as your new hostname. Your new hostname should also resolve to the server’s main IP address.
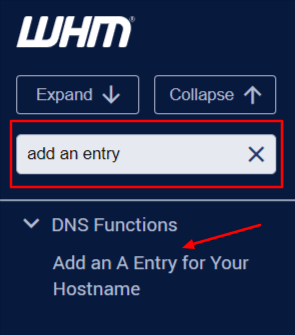
- Once the system has changed your hostname, use the search bar to locate and click Add Entry for Your Hostname.

- Make sure your server’s information is correct and click Add Entry.

The system will automatically configure the new hostname and add the correct “A” DNS entry.

