Table of Contents
Change RDP Port – The Remote Desktop Protocol (RDP) enables remote access to Windows computers and servers. By default, RDP uses a listening port on port 3389, a well-known port that can be a target for malicious attacks. Changing the RDP default port can enhance your system’s security by making it less conspicuous to potential attackers.
This detailed tutorial will walk you through the steps to change the RDP port on a Windows machine, helping to secure your remote connections.
What is RDP Port?
The Remote Desktop Protocol (RDP) port is a crucial component of Windows operating systems that facilitates remote desktop connections, allowing users to access and control another computer over a network. default RDP port is 3389 to listen for incoming connections. This port acts as a gateway for administrators and users to connect to a computer remotely, providing the flexibility to work from any location as if they were sitting right in front of the remote machine. The ability to change this default port is an essential security measure for reducing unauthorized access risks by making the service less discoverable to potential attackers.
Explore the fundamentals and applications of RDP in remote desktop technology.
RDP port is an essential feature for many users while setting up a remote desktop connection in windows or mac devices with the remote access port. However, changing the default RDP port [Default RDP Port Number is 3389, and it is used for Microsoft terminal server] can also create issues in maintaining the usual working devices. To fix this problem, this guide will help you with this tutorial on change RDP port in windows.
When you connect to a remote computer (either a Windows client or Windows Server) through the Remote Desktop connection, the Remote Desktop feature on your computer “hears” the connection through a listening port (3389 by default). You can change that listening port on Windows computers by modifying the registry. This article will guide you to change the RDP port used in remote desktop access.
Discover the power of seamless remote computing with our Windows VPS solutions, designed for optimal performance and security.
Why Change RDP Port?
- Reduced Attack Surface: By moving away from the well-known default port, you make it slightly more difficult for attackers to identify open RDP services on your network. This can be particularly effective against bots and automated attack tools that scan large IP ranges for open default ports.
- Obscurity as a Layer of Defense: While not a robust security measure on its own, port obfuscation can add an extra layer of defense by obscuring your RDP setup. It’s akin to hiding a door from a would-be burglar; while it doesn’t make the door any stronger, it might make it less likely to be targeted.
How to Change the Remote Desktop Port on Windows?
2 methods to change RDP port on windows server
Method 1. Change RDP port by using Registry Editor
Step1: Need to connect windows server with Administrator privilege, then type below command in search box “regedit”

Step2: You need to follow the below path to change the RDP Port in the Windows system.
HKEY_LOCAL_MACHINE\System\CurrentControlSet\Control\Terminal Server\WinStations\RDP-Tcp

Step3: After following above path steps, need to right click on on port number then provide the wanted port number for connection.

Step4 :: Need to follow below steps to change the port number in registry.


Now give your desired port number to connect to the windows server…

Step5 :: Now I need to exit the registry then reboot the server to see the changes on it.
Step6 :: Now we have to check the server connection with the new RDP port.

Method 2. Change RDP port by the Windows Firewall
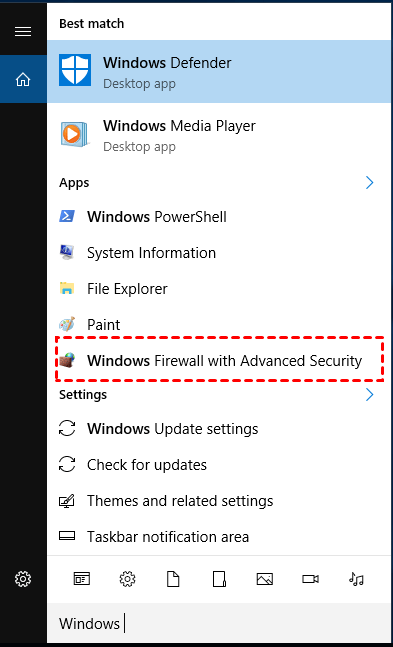
Step 1. Search Windows Firewall in the search box and then choose “Windows Firewall with advanced security”.
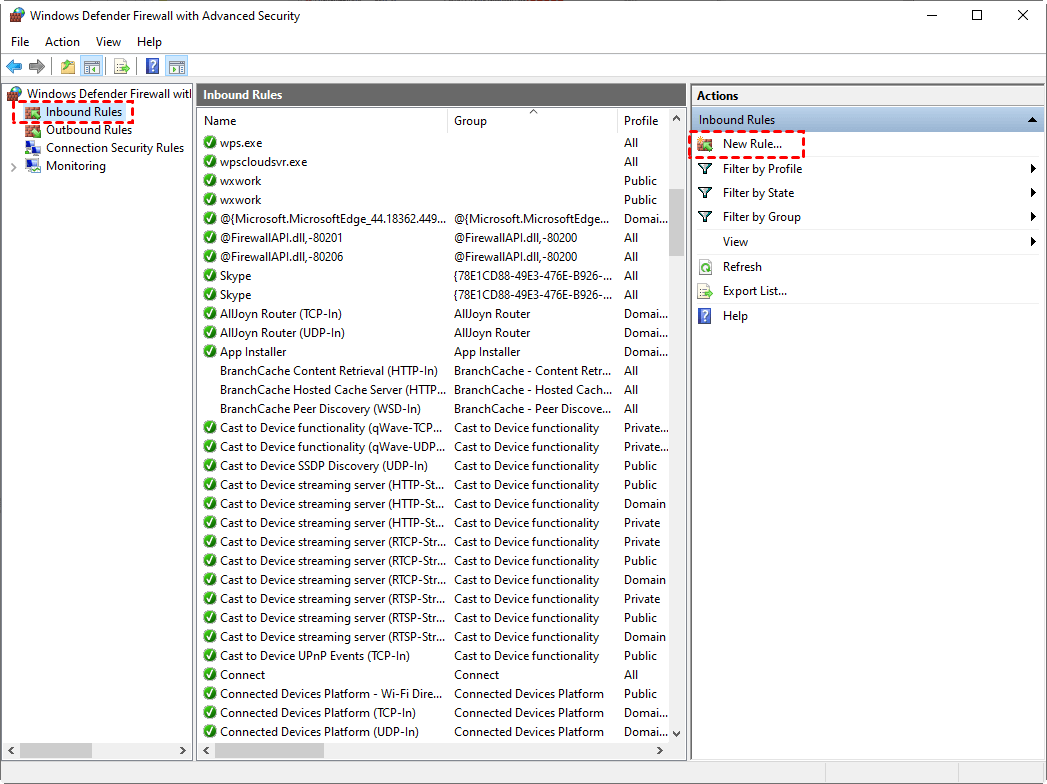
Step 2. From the left sidebar click on Inbound Rules.
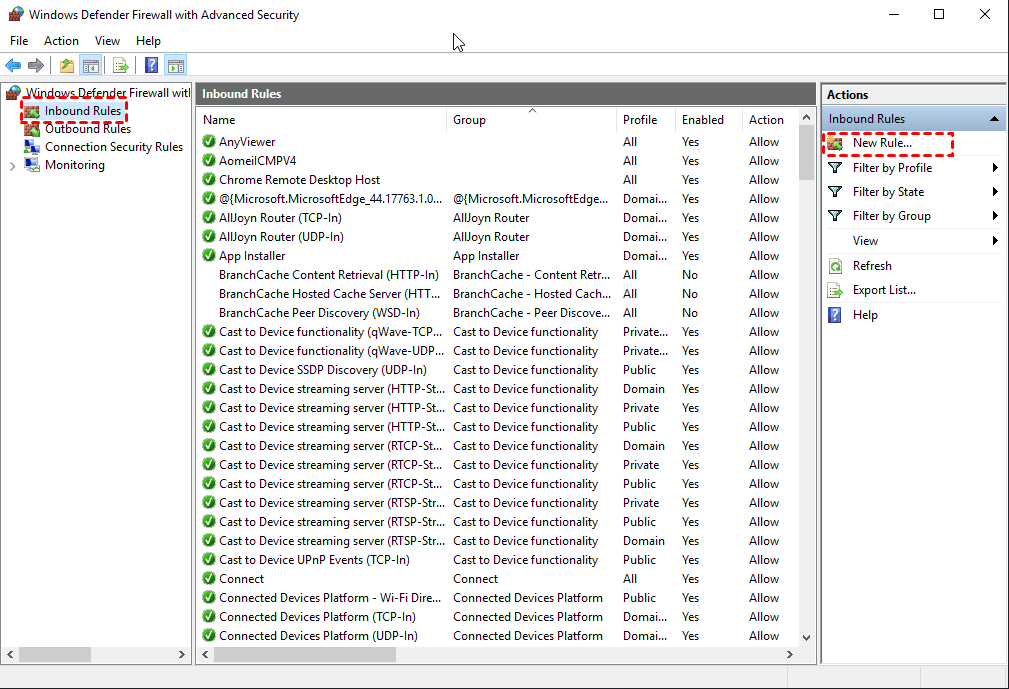
Step 3. From the right sidebar click on New Rule.
Step 4. Select Port and click Next.

Step 5. Select TCP and type the port number in a Specific local port and click Next.
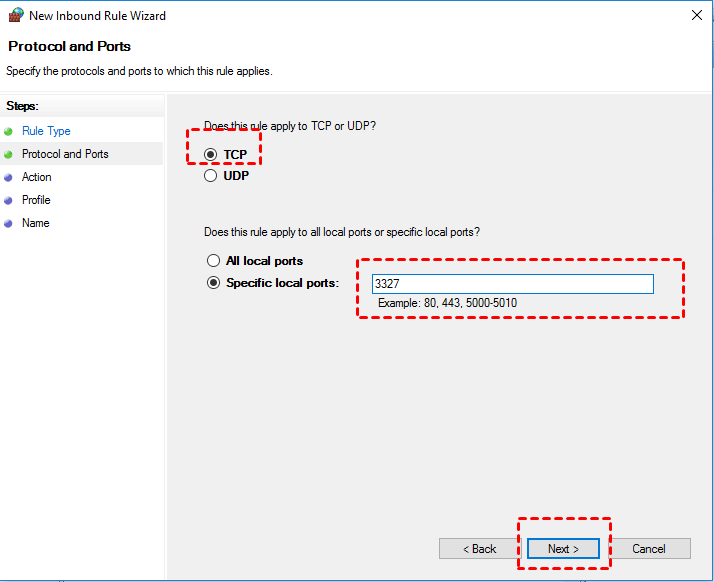
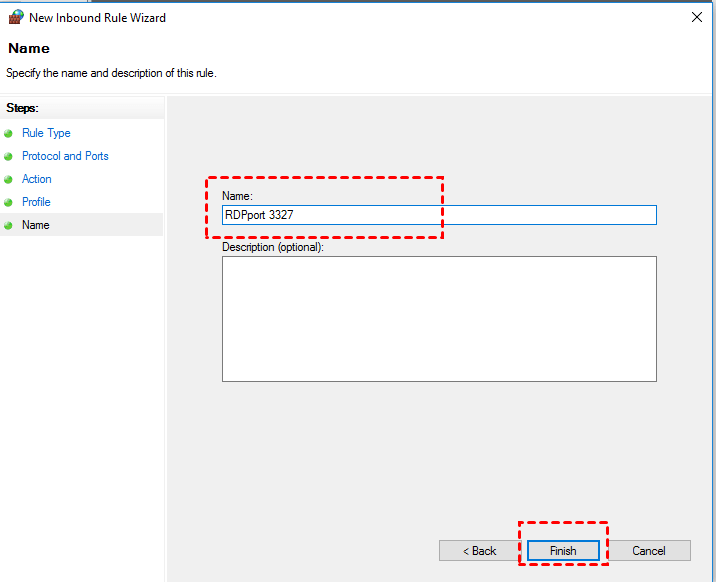
Step 6. Type in a name for the rule such as “TCP port 3327,” then click “Finish” to allow the 3327 port in Windows Firewall. Now “Windows Server 2016 RDP port Firewall” is done successfully.
Conclusion
In this article, we tried to briefly explain what an RDP port, and how to change the RDP port on a Windows server. You can use this guide for almost all Windows versions like Windows Server 2022, Windows 10, Windows 8.1, Windows 8, Windows Server 2019, Windows Server 2016, Windows Server 2012 R2, Windows Server 2008 R2. We hope this guide helped you.
You can also visit the detailed blog of Windows VPS hosting and its benefits


